You can specify the following properties for a Source dimension.
Settings
-
Data Type: Not all data types will be available for every Source dimension.
-
DataKey Text: This will read the value from the file as defined in the position settings.
-
Stored DataKey Text: This will override the position settings and force the Time value to be a constant value for every line.
-
Global DataKey Time: This will use the Time value from the current Global POV time being processed.
-
Current DataKey Time: This will use the Time Value from the current Workflow POV.
-
Current DataKey Scenario: This will use the Scenario value from the current Workflow POV.
-
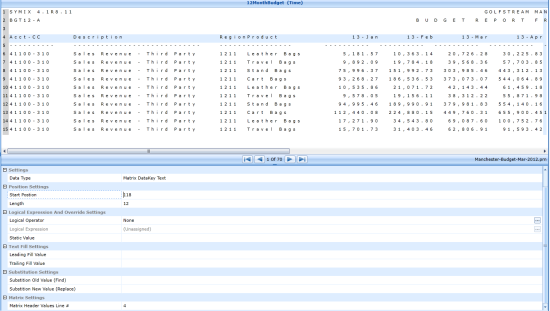
Matrix DataKey Text: This is used as a Data Type when the data source is setup as a Matrix Load with multiple periods and used to identify the defined Start Position and Length of a single period.
-
Text: This will read the value from the file as defined in the position settings.
-
Stored Text: This will override the position settings and force the value to be a constant value for every line.
-
Matrix Text: This will have multiple amounts on a given line using rows and columns. This will determine the intersection that corresponds with each amount when more than one column contains the same dimension.
-
Label: This will read the value from the file as defined in the position settings.
-
Stored Label: This will override the position settings and force the value to be a constant for every line.
-
Numeric: This defines the numeric amount field for the data source. This field will be read and stored as a number, not as text or string.
Position Settings
Position settings are the definition of where the Source dimension will be found in the source file. For both fixed width and delimited files, there are tools in the toolbar and an attached file that assist in populating these values. Highlight the specific area to assign it to a dimension (for a delimited file, it only needs to be a portion of the column). The highlight will appear in red. When the defined area is selected, click  . This will commit the selection to the dimension and the corresponding values will be populated in either the Start Position and Length fields for Fixed Width or the Column Number field for Delimited. To clear this selection without committing it to the dimension, click
  .
.
-
Start Position (Fixed Files Only): This is the numerical representation of the starting point for a line item.
-
Length (Fixed Files Only): This defines how many characters will be taken from the start position.
-
A Fixed data source with a start position of 20 and a length of five will start with the 20th character and include the next five characters.
-
Column (Delimited Files Only): A delimited data source will use a column number. If the column number is four, that dimension will be represented by the 4th column in the source file.
Connector Settings
Source field names will be provided by the Connector business rule assigned to the connector data source. These field names will either be explicitly listed out in the business rule, or dynamically returned from a SQL query. Source field names for Data Management Sequences are provided and always contain the same list.
Logical Expression and Override Settings
-
Logical Operator: Allows the ability to assign a .NET scripting functionality to a dimension of a data source.
-
Complex Expression: This selection is used when .NET scripting is needed for the dimension, but not needed elsewhere. The script used in the complex expression will only be available within that dimension.
-
Business Rule: This selection is used when .NET scripting is needed for the dimension and the script is available in the Business Rule Library.
-
Logical Expression: This is the name of the business rule assigned to the dimension when Business Rule is selected for Logical Operator.
-
Static Value: This is an override setting which allows a hard-coded value to be assigned to a dimension rather than being read from a file or data source.
Date Fill Settings
-
Date Format: Users can specify a list of datetime formats to apply, as accepted by DateTime.TryParseExact. See Microsoft DateTime.TryParseExact Method for more information. One of these formats must match exactly, in order for the value to be considered valid. See Microsoft Custom date and time format strings for more information.
If no format is specified, the system falls back to Invariant Culture short date formats. For example, M/d/yyyy, M/d/yy, MM/dd/yy, MM/dd/yyyy, yy/MM/dd, yyyy-MM-dd, or dd-MMM-yy.
Valid values must be between 1 January 1900 and 31 December 2200.
Text Fill Settings
-
Leading Fill Value: Characters entered in this field will precede whatever value is brought in from the file upon import.
Lead Fill Mask = xxx, data value = 00, results value = x00
-
Trailing Fill Value: Characters entered in this field will be placed after any value brought in from the file upon import.
Trail Fill Mask = xxx, Data Value = 00, Results Value = 00x
Substitution Settings
-
Substitution Old Value (Find): If the value entered in this field is encountered in the dimension, it will be replaced with what is entered in the Substitution New Value.
Single Value = value1
Multiple Values = value1^value2
-
Substitution New Value (Replace): This will replace the value in Substitution Old Value if it occurs in the dimension.
Single Value = value1
Multiple Values = value1^value2
Empty String | Null|
Single Space |Space|
Matrix Settings
This setting is only available when Matrix is set as the Data Structure Type.
Matrix Header Values Line #: This setting indicates which row to look to for the dimension being matrixed. For example, if months are listed across columns on line four, and time is the intended Member to be matrixed, a 4 would be entered in this field.
Numeric Settings
These settings are only available in the Amount Source dimension which will help with the formatting and properties of the amount values.
-
Thousand Indicator: Enter the character used to separate thousands in the value. For example, for the value 1,000 the Thousand Indicator is “,”. This can also be done by highlighting the character in the file and clicking
 .
. -
Decimal Indicator: Enter the character used to separate decimals in the amount value. This can also be done by highlighting the character in the file and clicking
 .
.


